[German version]Here I reported, that Google has released android 4.0 (Ice Cream Sandwich) source code to the public. It is known since months, that ICS is also optimized for x86 architecture. Therefore it would be only a question of time, until the first Android x86 port of Ice Cream Sandwich would be available …
Build your own Android-x86 ICS …
Today I stumbled upon a twitter entry from a japanese guy pointing to his japanese website. This guy reported how he manged to downlaod the ICS sources and using Ubuntu 10.04 to build his own image for Virtualbox x86. Here are the commands to set up a build environment in Ubuntu 10.04:
$ sudo add-apt-repository

"deb http://archive.canonical.com/ lucid partner"

$ sudo apt-get update

$ sudo apt-get install sun-java6-jdk

$ sudo apt-get install git-core gnupg flex bison \

gperf build-essential zip curl zlib1g-dev \

libc6-dev lib32ncurses5-dev ia32-libs \

x11proto-core-dev libx11-dev \
       lib32readline5-dev lib32z-dev \

libgl1-mesa-dev g++-multilib mingw32 \

tofrodos python-markdown \

libxml2-utils
Note: Set up your build environment ist documented at google site [5].
After setting up the environment, the souce files can be obtained using the commands below.
$ mkdir ~/bin

$ PATH=~/bin:$PATH

$curl  > ~/bin/repo

$ chmod a+x ~/bin/repo

$ mkdir WORKING_DIRECTORY

$ cd WORKING_DIRECTORY
$ repo init –u

https://android.googlesource.com/platform/manifest

-b android-4.0.1_r1
Note: Some commands are using two lines for formatting purposes – but it is online on command. If in doubt, please consult the japanese site linked above.
The japanese user mentioned, that he has to start the downloald several times, because the google server has a lot of traffic.
After successful download, we can use the following command to build a Virtualbox image.
$ . build/envsetup.sh
$ lunch vbox_x86-eng
# this takes approximately 6 hours or longer  …
$ make –j4

# enable network to configure DNS
$ echo "net.eth0.dns1=8.8.8.8" >>
out/target/product/vbox_x86/root/default.prop

$ echo "net.dns1=8.8.8.8" >>
out/target/product/vbox_x86/root/default.prop
$ make
# Create Installer-VDI
$ make android_disk_vdi
In a discussion thread in XDA forum, somebody reported that the build process took 19 hours – so please be patient (I havn’t tested it yet). The make script creates a .vdi file ready to be bootet in Virtualbox.
Ice Cream Sandwich test drive in Virtualbox
If you haven’t the time (like me) and the experience to build your own Virtualbox image, it would be prefereable to download a ready to use image from internet. Unfortunately Android-x86.org project hasn’t released an ICS version. But I found this thread in XDA developers forum. A guy mentioned that he has build ICS for Virtualbox and he pointed to this webseite. Gregory Strike presented on this site his first successful Ice Cream Sandwich build for x86 platforms. And he uploaded his build to the internet. So at least I was able to download a Virtualbox image file. After unzipping the .vdi file, I was able to mount and boot it in Virtualbox.
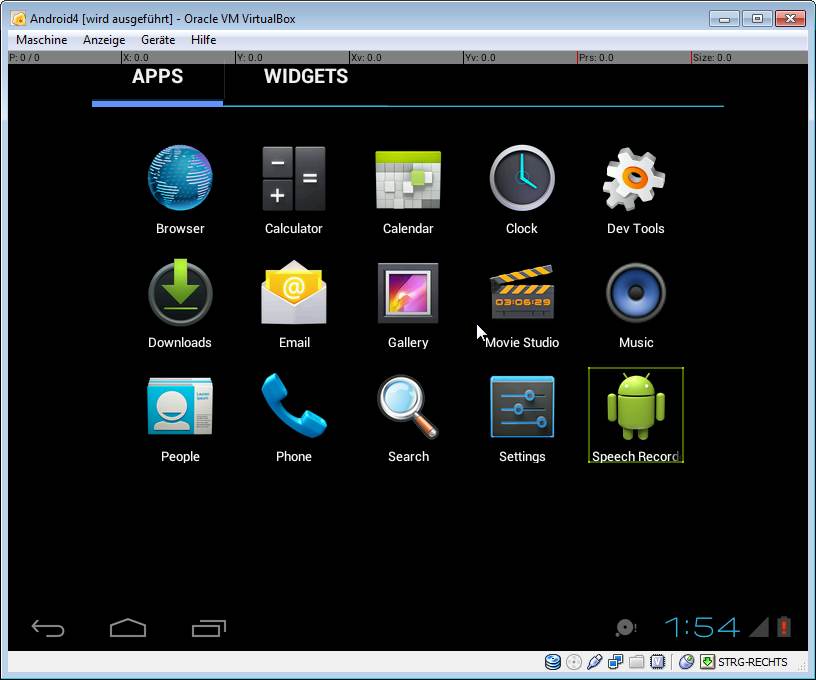
After booting, the Ice Cream Sandwich lock screen is shown, and you need to enter pin code 1111 to unlock. Afterward I was able to access ICS Android desktop in Virtualbox. Below are two screen shots of my desktop an my app page.


This build was booteable, but I have had no mouse nor network support. You need to use the keyboard (tab, esc and cursor keys) to select some items. According to some discussions in XDA developers forum it’s mandatory, that the host system supports VT (VT-X). The build from the japanese guy, I mentioned above, already contains network and mouse support (as it is visible on the video). So I think I need to build my own Virtualbox ICS version – until somebody else will do that and shares the result with the public …
Links:
1: ICS für Virtualbox selbst bauen (Japanese)
2: Diskussion im XDA Developers-Forum (English)
3: Ice Cream Sandwich in Virtualbox (English)
4: Virtualbox als Android-Emulator (German)
5: Google developer’s page (English)
6: Running Ice Cream Sandwich in Virtualbox Part I
7: Running Ice Cream Sandwich in Virtualbox Part II


